Sep 19, 2021
 ~4 minutes
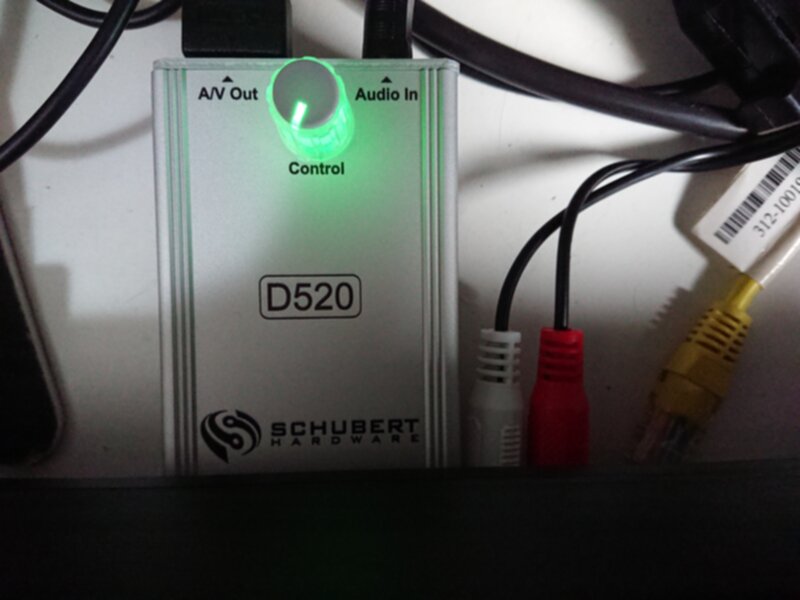
Amiga D520 Video Converter
I recently obtained a D520 video converter. It plugs in to the video ouput and has an optional audio input to combine audio and video in the HDMI signal, apparently at the cost of some visual integrity (although I couldn’t see any difference).
Previously I was connecting my Amiga 1200 using a cable which simply adapted the wiring from the 23-pin d-sub Amiga connector to a SCART. However I wasn’t enamoured with this as SCART always seemed like a clumsy connector, and it’s also harder to find screens that still have connectors for it. The Picture
Another benefit of the D520 is that it performs practically lag-free upscaling to a variety of screen modes (from 640x480 to 1280x720 at 50 and 60Hz), and so will support pretty much every monitor available today. There is also scanline emulation which actually looks pretty good.
Actually the picture does look amazing - as one might expect from HDMI, the picture is crystal clear, and the colours are also clear and vibrant. I’ve not done any kind of serious test, but I’m sure the colours are clearer and brighter than they were with SCART.
Firmware
It also has upgradable firmware, which appears to be really easy to install - it’s just an ADF (Amiga disk file), and loads an image to the screen, which in turn is used to pass information to the device.
The Unit
The unit itself is reassuringly solid, and as the power is taken from the port itself, doesn’t need any additional power input. It has two rubber feet which support its weight when it’s plugged in, so it fits solidly in the port with minimal risk to accidental damage to the port through strain. There’s a rotary encoder which is the single method of selecting modes, which also has a multicoloured LED which turns red, green and yellow to indicate which mode it’s in (between resolution, position and firmware) and clicking it in selects the current option.
Some stumbling issues
There were a couple of minor issues I experienced while using it:
- First time I tried it, it took ages for my hard-drive to boot, and at first I thought it had crashed. It is possible that the power draw from it might cause issues depending on other hardware that’s installed on your Amiga. In my case, I have a BiFrost, which also hooks directly into a 5v powerline for additional power for brighter LEDs. Trying again, however, it seemed to work fine, so I’m not sure if it was a temporary glitch or not, but certainly something I’m keen to keep an eye on.
- I struggled at first to fit everything from Workbench into the screen (it was clipping part of the screen, and I couldn’t fit all icons / the full titlebar in the visible screen). This was a simple fix, and user error, as I’d forgotten that Workbench has some overscan settings, which adjusts for different visible areas in monitors, and finally got it to fit perfectly.
- The price. It is quite pricy for what appears to be a simple adapter. But don’t be fooled, as there’s a lot of work that’s gone into this device, and not only does it look like an authentic Amiga peripheral, it also doesn’t require any internal hacking - it’s a plug-and-play solution for HDMI output. Similar alternatives may have similar or slightly cheaper prices, but they also require additional power, space, and are also more complicated.
Conclusion
This truly is a remarkable addition. It adds future-proofing to ageing Amiga hardware, is compact and sturdy, and really looks the part (it is the same colour as an original Amiga case). While it may be costly, I feel it well worth the price if you’re wanting to breathe more new life to your old Amiga.
Photos
Contents of the D520 package Contents of the D520 package

Photo of the screen (the actual picture looks much better than this photo) Photo of the screen (the actual picture looks much better than this photo)

Picture of the D520 in situ Picture of the D520 in situ